Before you begin taking CMM measurements, it is crucial that you calibrate the probe precisely for all your measurement procedures. The effective dimensions of the probe components have to be established if accurate results are to be obtained. These values are stored in the CMM’s software.
How it works:
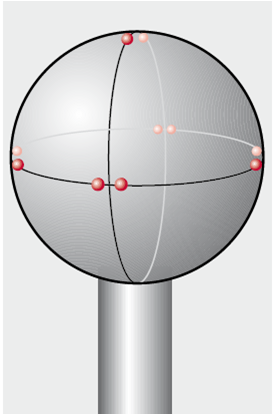
The position of the individual ball styli and their diameters are established using a Special probe calibration program; you contact a reference point with all the styli to be used, one after the other. The reference used is an extremely precise, manufactured ball with a known diameter. The exact dimensions of the ball being calibrated are input into the measuring software. If the styli are to be used for measuring separate points, the stylus is calibrated using a number of points on the reference sphere’s cardinal points (see image). A far greater number of points are taken for scanning systems.
The probe calibration procedure establishes the stylus tip’s effective diameters when measuring, and their positions in relation to one another and to the machine’s co-ordinate system. A special analysis program incorporating the known diameter of the calibration sphere is used to establish the unknown diameter of the stylus tip. The coordinates of the centre of the first stylus ball calibrated are stored in the CMM’s software as reference co-ordinates. All the remaining tip positions are established by generating differences with the first one, and then also stored as ball centre coordinates. Once the various tips of a stylus configuration have been calibrated, their centre points are compensated for by the CMM software, so that measurements with all the styli appear as though they had been taken with just a single stylus. This means that whichever stylus you use to probe a point, you always get the same result.
